

The quickest way to secure approval is to show the artwork in its actual context, either as an in‑situ photo mockup or a scaled render, alongside one concise spec sheet and a clear sign‑off step. This combination answers the three questions every client asks without saying them aloud: what will it look like, what will it cost, and when can we commit? Save specialist detail for pieces that raise genuine lighting or conservation risk.
TL;DR:
- Showing artwork in real or scaled format with a concise spec sheet streamlines approval, answering clients’ questions about appearance, cost, and timing.
- The ideal presentation format depends on project size and complexity, ranging from brief descriptions to 3D renders or physical mockups, with matching the format to client familiarity and schedule.
- Accurate wall measurements, clear scale references, and lighting conditions are essential for convincing visuals, with lighting passes revealing color shifts before final approval.
- A strict three-stage approval process (concept, technical, final) and a standard checklist ensure clarity, prevent delays, and facilitate traceable feedback especially in multi-stakeholder projects.
- Clarify copyright ownership, usage rights, and framing details upfront to avoid disputes, especially when artworks appear in marketing, media, or public spaces.
Table of Contents
- Choosing the right presentation format for your project
- Building mockups and visuals that actually convince clients
- Getting scale and placement right before the client sees it
- What to flag about lighting and display conditions
- Running a clean approval process from concept to sign-off
- A reusable checklist and spec sheet you can paste into any email
- Turning objections into useful feedback
- Legal and copyright points worth confirming before you present
- What commissioning bespoke artwork has taught us about presenting it well
- Commissioning through Frametheworld: previews, sizing and trade support
- FAQ
- Sources
Choosing the right presentation format for your project
Not every project needs the same level of visual polish. A small residential commission might only need a short written brief describing the piece, its dimensions and finish, while a commercial lobby installation calls for layered visuals that walk stakeholders through scale, placement and lighting together.
Four formats cover most situations. A text brief works for quick decisions between a designer and a single homeowner. Sketches or CAD drawings suit the concept stage, when you are testing composition or room layout before committing to a specific piece. 3D renders or augmented reality help when a client needs to feel the scale of a piece in a real room, particularly for oversized or multi‑panel works. Physical mockups, such as printed proofs taped to a wall, remain the most persuasive tool for final sign‑off because they remove any doubt about colour and size.

RICS design guidance notes that the presentation form chosen at the outset shapes how the detailed design develops afterwards, so it is worth matching the format to the project’s complexity rather than defaulting to whatever is quickest to produce. A single-family home rarely needs the same documentation as a multi-unit development, and mismatching the two wastes time on both sides. Base your choice on the client’s familiarity with visual tools, the project’s programme, and what your own team can realistically produce without delaying the decision.
Building mockups and visuals that actually convince clients
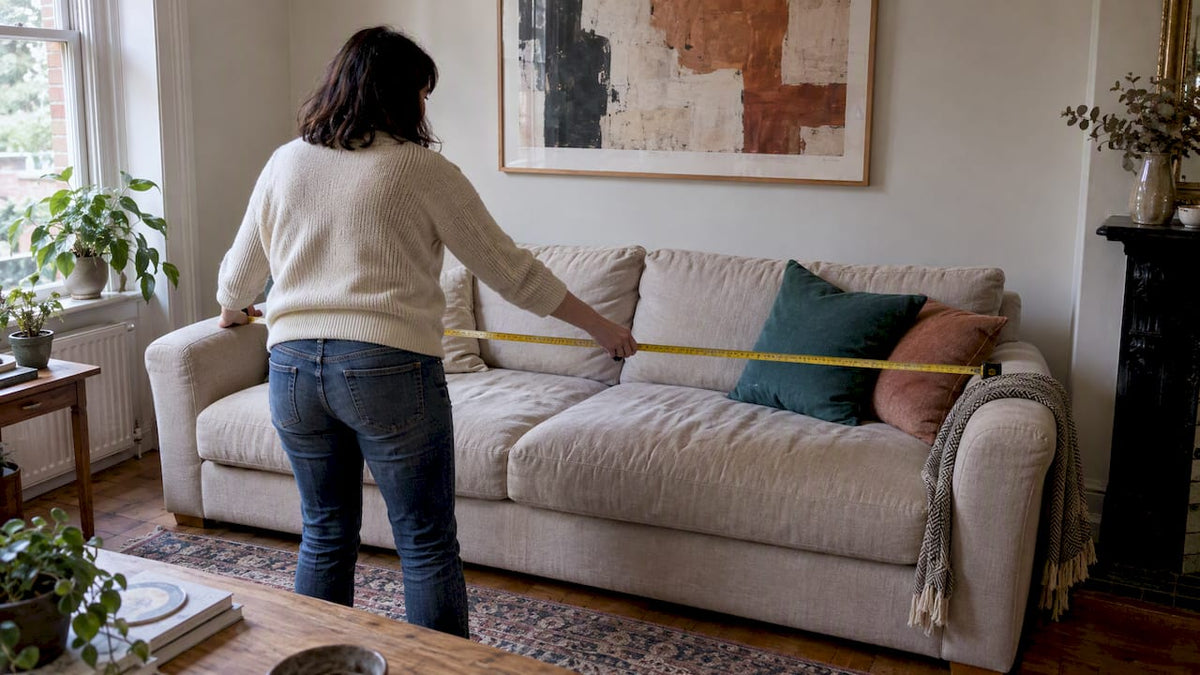
Start by measuring the wall accurately, including any obstructions such as switches, radiators or skirting heights that will affect final placement. From there, a photo overlay, where the artwork is digitally placed into a photograph of the actual room, gives the clearest sense of scale without the cost of a full 3D render. A life‑size paper template taped to the wall achieves a similar result for in‑person meetings and costs almost nothing to produce.

Augmented reality apps and simple 3D renders suit remote or multi‑stakeholder reviews, letting several decision-makers view the same scene from their own protected devices. Printed mockups still win for final approval meetings, since nothing beats seeing the actual proportions in the room. Each has trade-offs: AR is fast but can distort scale on smaller screens, renders are precise but take longer to produce, and printed proofs are the most convincing but require someone on site.
Curate your options. Showing more than five variations invites indecision rather than confidence, so narrow the choice to a shortlist that reflects genuinely different directions, not minor colour tweaks.
- Measure the wall and note any fixed obstructions before producing visuals.
- Produce one photo overlay or life-size template as the primary reference.
- Offer two or three alternates that vary meaningfully in scale, frame or orientation.
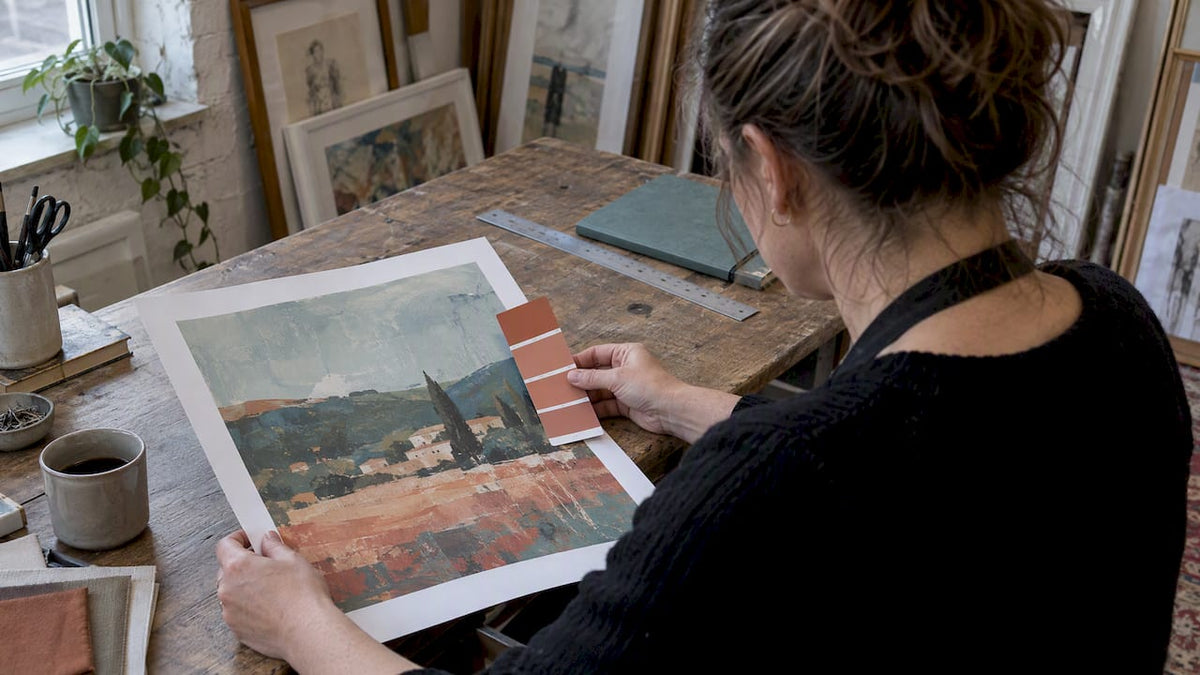
- Include one lighting pass so colour shifts under real light are visible before sign-off.
Pro Tip: Always include one lighting pass, either a photograph taken under the room’s actual lighting or a render using the intended lamp colour temperature, so the client sees likely colour shifts before the piece arrives.
Getting scale and placement right before the client sees it
Most placement disputes come down to size, not taste. A common rule of thumb is to size art at roughly two thirds of the furniture or wall width below it, which keeps the piece visually anchored rather than floating. For standalone walls, centring the artwork around eye level, typically 145 to 155 centimetres from the floor to the centre of the piece, works for most room heights and keeps the composition readable for seated and standing viewers alike.
When presenting grouped arrangements, show the spacing explicitly. A tight grid suits a modern, uniform look, while a salon-style cluster with varied frame sizes and five to ten centimetres of breathing room between pieces reads as more considered and personal. A quick overlay or marked-up photo communicates this far better than a verbal description.
Always consider the room from the decision-maker’s actual viewpoint rather than a straight-on camera angle. Where people enter, sit or walk through matters more than a flattering photograph, so check sightlines and circulation before finalising a layout. Our guide to selecting art size covers these ratios in more depth for different room types.
What to flag about lighting and display conditions
Lighting changes how colour reads more than almost any other variable, so it deserves a line in every presentation, not just a technical footnote. CIBSE guidance on gallery and museum lighting recommends specialist input wherever accurate colour rendering matters, and the same logic applies to a client’s living room or boardroom.
A few points are worth raising early with any client:
- Warm lamp colour temperatures shift reds and oranges, while cooler tones can flatten warmer palettes.
- A high colour rendering index helps the piece look as it did in the studio or mockup.
- Avoid direct glare across the surface, especially on varnished or textured canvases.
- Dimmable accent lighting gives more flexibility than a single fixed spotlight.
For higher-value or conservation-sensitive commissions, the Bizot Green Protocol sets out recommended display climate ranges and favours a combined approach of insulation, ventilation and targeted climate control rather than relying on air conditioning alone. Mounting in rented premises or historic buildings often restricts fixing methods too, so flag that constraint before specifying hardware. Our piece on UV protection covers practical steps for safeguarding colour over time.
Running a clean approval process from concept to sign-off
A three-stage flow keeps expectations clear and avoids last-minute surprises. The concept stage presents direction and mood, options rather than a single finished choice. The technical stage locks in size, materials, frame and mounting details alongside a firm price. Final sign-off confirms the exact piece, installation date and any remaining conditions.
Be explicit about what is included. One or two revision rounds within the quoted price is typical; anything beyond that should carry a stated cost before work begins, not after.
- Share annotated mockups showing the agreed concept and any alternates considered.
- Confirm the spec sheet covering dimensions, material, frame and lead time.
- Note installation requirements, including wall type and any access constraints.
- Record written sign-off, by email or signature, before placing the order.
A reusable checklist and spec sheet you can paste into any email
Keeping a standard checklist on hand speeds up every new project and reduces the chance of missing a detail that causes delay later.
- Confirm wall dimensions, obstructions and viewing distance before producing mockups.
- Include one in-situ image or life-size template plus up to two alternates.
- Note the lighting conditions used for the mockup, including lamp type if known.
- List approval points: concept, technical and final sign-off, each with a date.
A one-page spec sheet should carry the title, dimensions, material, frame, mounting method, finish, lead time, price and return terms, all on a single page so nothing gets lost in a longer document. For sign-off itself, a short line works well: “I approve the artwork, size and finish as shown above and authorise the order to proceed.” Keeping that phrasing consistent across projects makes it instantly recognisable to repeat clients.
Turning objections into useful feedback
Most objections are really requests for reassurance, not rejection of the piece itself. When a client hesitates over colour, size or placement, ask what specifically feels wrong rather than offering an immediate alternative. Often the concern traces back to lighting, scale or an unspoken budget worry rather than the artwork itself.
Separate preference from risk. A client disliking a colour is a straightforward revision; a client worried about fading, fixings or wall damage is a technical concern that deserves a direct, specific answer rather than reassurance alone. Addressing the second type with a clear plan, such as UV-protective varnish or a specified fixing method, tends to resolve the objection faster than repeated design tweaks.
Document every round of feedback against the spec sheet so changes are traceable. This matters most on larger commercial or multi-stakeholder projects, where one decision-maker’s revision can contradict another’s earlier approval. A brief written summary after each meeting, listing what changed and why, prevents the same discussion recurring weeks later.
Where a client pushes back on price after seeing the finished mockup, revisit the spec sheet rather than discounting on the spot. Often the objection softens once lead time, materials and the bespoke nature of the work are laid out plainly again.
Legal and copyright points worth confirming before you present
Before circulating any mockup or finished commission, confirm who holds the copyright. For a commissioned original, the agreement should state whether the artist retains copyright while the client owns the physical piece, which is the common arrangement for bespoke work, or whether reproduction rights are transferred as part of the sale.
If artwork will appear in marketing material, a show home, or a commercial space open to the public, check whether that use is covered by the original agreement or needs separate permission. This applies equally to images of the artwork used in your own presentation decks or social posts, since reproducing a commissioned piece without the artist’s consent can breach copyright even when the client owns the physical canvas.
For reproductions, prints or any artwork referencing another artist’s style too closely, confirm originality before presenting it as a finished option. Clients rarely ask about this upfront, but raising it early, as a single line in your spec sheet confirming copyright ownership and usage rights, avoids a difficult conversation after installation.
What commissioning bespoke artwork has taught us about presenting it well
Commissioning a hand-painted piece forces a level of clarity that off-the-shelf art rarely demands. When we work with clients on bespoke canvases, the preview stage matters most: a digital mockup showing the proposed composition, palette and scale in the client’s own space, with room for revisions before anything is painted. That sequence mirrors the concept-to-sign-off flow covered above, and it works for the same reason: it separates taste decisions from technical ones.
A practical note from handling commissions directly: agree the frame and finish before the final approval stage, not after, since both affect how the piece reads on the wall. Our guide to frame selection and our framing guide for interiors go into more depth on this if you are presenting framing options alongside the artwork itself.
— Lennard
Commissioning through Frametheworld: previews, sizing and trade support
When a client has approved a direction but needs the actual piece, we offer a commissioning route built around the same preview-and-sign-off process covered throughout this piece. We produce bespoke sizing to fit the exact wall or space, digital previews before any paint is applied, and quotations for trade and larger project volumes, so the approval workflow you have already built with your client carries straight through to the order itself.
The route is simple: request a preview of the proposed piece, approve the mockup once scale and palette look right, then sign off to confirm the order and lead time. For bespoke commissions and our full range of hand-painted collections, our handpainted masterpieces landing page is the place to start, and our abstract collection offers ready pieces for clients who want to move faster without a custom brief.
FAQ
What’s the fastest way to get client approval on artwork?
Pair a realistic in-situ mockup, either a photo overlay or a scale render, with a one-page spec sheet covering dimensions, material and price. Clients approve faster when they can see the actual scale and colour rather than imagining it from a description.
How many mockup options should I show a client?
Keep the shortlist to three to five genuinely different options rather than minor variations of the same idea. Too many near-identical choices slows decisions down rather than helping clients feel confident.
Do I need a 3D render for every project?
No. A text brief or simple sketch suits small residential decisions, while 3D renders or immersive real-time models are more useful for larger commercial schemes with multiple stakeholders reviewing remotely.
Who owns the copyright on a commissioned artwork?
This depends on the commissioning agreement: typically the artist retains copyright while the client owns the physical piece, unless reproduction rights are explicitly transferred. Confirm this in writing before using images of the piece in marketing material.
How should I present lighting considerations to a client?
Note the lamp colour temperature and colour rendering used in your mockup, and flag any glare risk on varnished or textured surfaces. For high-value or conservation-sensitive pieces, CIBSE lighting guidance recommends involving a specialist before finalising fixtures.
Sources
- Bizot Green guidelines: adopting the Bizot Green guidelines
- Design and specification, 1st edition — RICS
- LG8 lighting for museums and art galleries — CIBSE

Laat een reactie achter
Deze site wordt beschermd door hCaptcha en het privacybeleid en de servicevoorwaarden van hCaptcha zijn van toepassing.