

Five approaches cover almost every situation: leave the sides raw or primed, paint them a solid colour, extend the image around as a gallery wrap, apply a quick tape- or stain-fix, or frame the piece without finishing the edges. The deciding factor is nearly always stretcher depth combined with how the work will be displayed or sold. A professional route exists for artists who would rather commission a finished piece or a custom gallery wrap than tackle the edges themselves.
TL;DR:
- Painting the sides a solid color works best for works with hard edges and requires careful material selection between gesso and acrylic for maximum coverage.
- Gallery wraps extend the painted image around the edges and suit abstract or landscape pieces that lack precise geometric lines, but they may hide parts of the original image.
- Leaving canvas sides raw or primed is suitable for textured or minimalist work but requires extra conservation care to prevent yellowing or rust stains over time.
- Using tape or quick fixes is ideal for temporary presentations or studies but is not recommended for long-term display due to potential residue and aging issues.
- Proper preparation, such as gessoing staples and sanding corners, ensures a professional finish, while framing options like floating or box frames can replace the need for edge finishing altogether.
Table of Contents
- At-a-glance comparison of canvas edge finish options
- Painting canvas edges a solid colour: materials and technique
- Extending the image around the sides: gallery wrap and mirrored edges
- Leaving canvas sides raw, primed or stained
- Tape, binding and quick studio fixes
- Preparing canvas edges properly before finishing
- Framing options that replace or complement edge finishing
- How do you choose the right canvas edge finish?
- Frametheworld’s practical perspective on canvas finishing
- An editorial note on restraint in finishing choices
- Get a professional finish without the studio guesswork
- Sources
- FAQ
At-a-glance comparison of canvas edge finish options
Each option suits a different studio situation, and the right one usually reveals itself once you know how the piece will be shown.
- Solid colour (often black): Suits contemporary and abstract work; gives a clean, gallery-ready frame line with no distraction from the front image. Downside: uneven paint application shows badly under gallery lighting. See the painting section below for technique.
- Gallery wrap (image continues round): Suits landscapes, abstracts and anything without a hard-edged composition; the piece looks finished with no visible border at all. Downside: you lose a strip of the original image to the sides. Full method further down.
- Raw or primed canvas: Suits textural, minimalist or unfinished-aesthetic work; keeps a warm, tactile edge. Downside: raw cotton or linen marks and yellows over time.
- Tape or stain (quick fix): Suits studies, quick sales and temporary display; fast and cheap. Downside: archival concerns if the tape is left on long term.
- Frame it and skip the finish: Suits any depth of stretcher and any style; removes the decision entirely. Downside: adds cost and changes the piece’s footprint on the wall.
Painting canvas edges a solid colour: materials and technique
Painting the sides a flat, uniform colour, usually black, is the most requested of all canvas edge treatments, largely because it reads as intentional and professional even on a modest budget.
The first decision is material. Black gesso and black acrylic paint look similar in the tin but behave differently on the canvas. Gesso has more body and covers the weave in a single coat, which matters on the side of a stretcher where brush marks are viewed edge-on and any thin patch is obvious. Acrylic paint often needs two or three coats to reach the same opacity, and each extra coat adds drying time and the risk of visible layering at the corners.
- Stretch masking tape or low-tack painter’s tape hard against the front edge of the canvas, pressing the crease down so no paint can creep under it.
- Load a flat, firm-bristled brush (2 to 3cm wide works well on standard bars) and paint in one direction along the length of each side rather than dabbing.
- Work wet paint towards the corners rather than starting there, since corners are where ridges and paint build-up show most.
- Pull the tape away before the paint fully dries, never after, to avoid tearing a hard skin off the front edge and taking flecks of your painted surface with it.
- Let the edge dry fully, then varnish once the whole piece, front and sides, has cured.
If you want a properly matte, non-reflective edge rather than the slight sheen gesso can leave, mix in a touch of Ultra Matte Medium before the final coat. It kills shine without changing the black’s density, which matters under angled gallery spotlights that pick out every glossy patch.
Pro Tip: Paint corners last and from two directions, feathering the brush inward from each adjoining side. It stops the small triangular ridge that forms when two wet edges meet head-on.
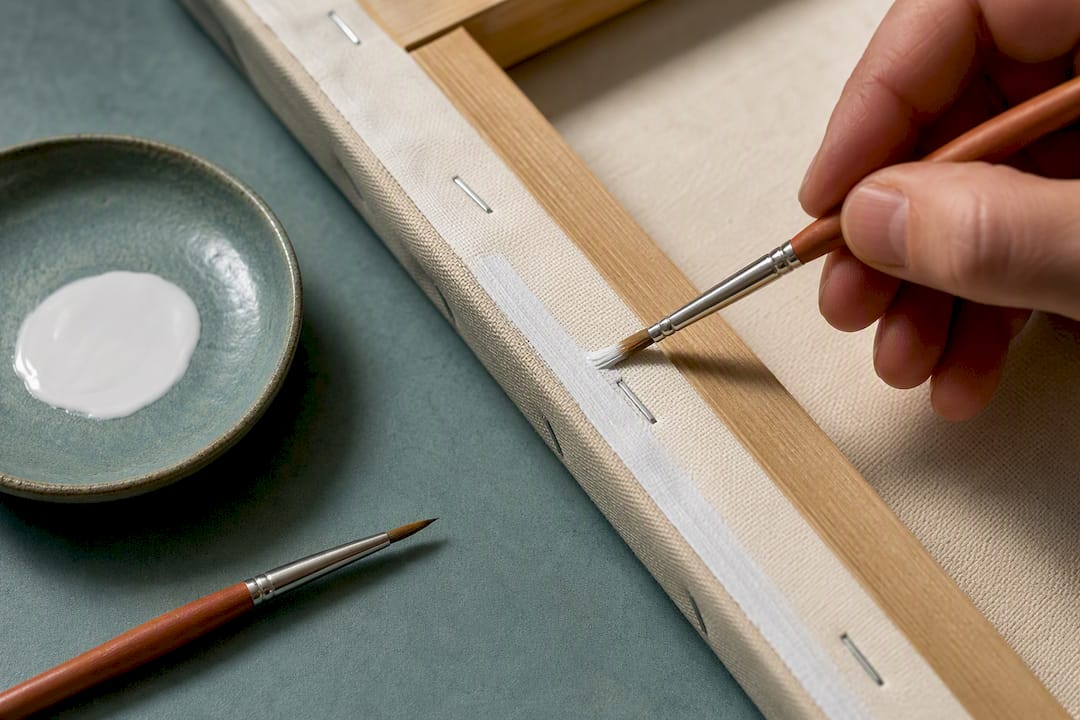
One conservation note worth remembering: whichever paint you choose, avoid painting directly over exposed staples without a gesso barrier first. Paint alone won’t stop the metal reacting with moisture in the air over years of display.
Extending the image around the sides: gallery wrap and mirrored edges
A gallery wrap continues the actual painted image over the stretcher sides, so the piece has no border at all when viewed from an angle. It’s the finish that most convincingly disguises the fact the work is stretched over wood rather than framed, and three mainstream strategies for finishing canvas edges consistently point to it as the option professional painters reach for first on abstract and landscape work.
For prints rather than original paintings, the equivalent trick is a mirrored edge, where the outer strip of the image is flipped and reflected onto the side rather than physically extended. It’s a print-production technique, so it doesn’t apply to hand-painted originals in the same way, but it’s worth knowing because mirrored edges preserve the full face image while a solid-colour edge deliberately sacrifices a strip of it for a cleaner minimalist look.
Planning a wrap on an original painting means building in a bleed margin from the start:
- Mark the true edge of your intended composition well inside the stretcher’s front lip, usually 4 to 5cm in, before you begin painting.
- Tape off the stretcher sides so paint that runs over the front edge doesn’t feather unevenly onto the sides.
- On shallow stretcher bars (under 2cm deep), a wrap can look cramped since there’s barely any side to read from an angle; deeper bars (3.5cm and up) give the wrap room to actually register as a design feature.
- Work around staples on the side rather than painting straight over them if they sit high, since paint pools unevenly against a staple head and telegraphs through as a bump.
If your composition has a hard geometric edge, straight lines, a defined horizon, a wrap will visibly distort that line as it turns the corner. That’s usually the point where a solid colour edge, or framing the piece outright, becomes the more sensible choice.
Leaving canvas sides raw, primed or stained
Not finishing the edges at all is a legitimate choice, not a shortcut, and it suits work where texture and honesty about materials matter more than a polished perimeter.
Raw or lightly primed sides give a warm, tactile border that suits abstract expressionist and textural work particularly well. If you’ve used an imprimatura, a thin toned ground layer, across the whole canvas before painting, that same warm undertone usually carries through to the untouched sides, which ties the edge visually to the front without any extra work.
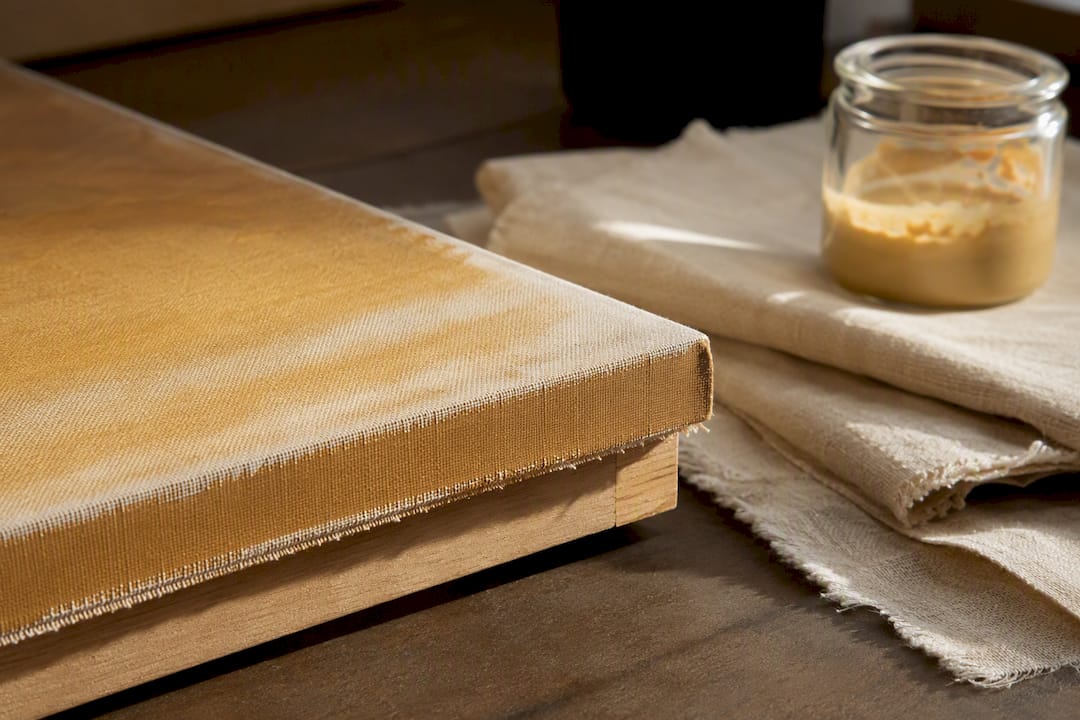
The trade-off is conservation, not aesthetics. Raw canvas attracts dust and handling marks over years on a wall, and unsealed cotton duck yellows faster than a gessoed surface exposed to the same light. If the canvas is stapled at the sides rather than the back, gesso the staple area even if you’re leaving the rest raw. It’s a small step that stops rust migrating from the staple into the surrounding fibre, which otherwise shows up as a brown stain years after the piece sold.
A few habits keep a raw or stained edge looking deliberate rather than neglected:
- Fit felt or rubber bumpers to the bottom back corners so the raw canvas never grinds against a wall.
- Position D-rings and wire well clear of the edge so hanging hardware doesn’t leave marks on visible sides.
- Dust the sides with a soft brush occasionally rather than a damp cloth, which can drive grime deeper into unsealed fibre.
Tape, binding and quick studio fixes
Tape is the fastest fix in the studio, and it has a real place, provided you’re honest about its limits.
- Run a strip of gaffer’s tape or good quality duct tape along each side in one continuous pull, smoothing from the centre outwards to avoid trapped air bubbles.
- Overlap corners with a mitred fold rather than a bunched-up wad of tape, which looks scruffy and lifts faster.
- For a slightly more refined look, dyed cotton edge-binding tape or artist’s linen tape gives a fabric finish rather than the shiny plastic look of gaffer’s tape, and it sits well on deeper stretcher bars.
- Remove tape by peeling slowly at a low angle, working from a corner, and stop immediately if you feel any resistance against the front paint film.
Tape is genuinely useful for studies, work heading straight into storage, or pieces going to a fast sale where a full paint finish isn’t worth the time. It’s a poor long-term choice for anything intended for a collector’s wall. Adhesive residue and yellowing tape are the two most common complaints on resold canvases finished this way, and disclosing tape use to a buyer is simply good practice if you sell the piece before replacing it with a permanent finish.
Preparing canvas edges properly before finishing
Whatever finish you land on, preparation decides whether it looks professional or amateurish six months later.
- Gesso the sides first if the canvas is stapled there, since gesso covers the metal and reduces the chance of rust bleeding through paint over time.
- Sand very lightly at the corners once gesso is dry, just enough to knock back any raised staple edge or ridge, before applying your finish coat.
- Check the corners under raking light before you paint over them; a jagged, uneven line at the corner is far more visible once the whole edge is a single flat colour.
- Seal fully and let everything cure before varnishing. Varnishing over a still-tacky edge traps moisture under the surface and can cause dulling or blooming later.
Pro Tip: Run your thumb along each side edge before painting. Any texture you can feel, a staple bump, a rough patch of raw canvas, will show up worse once it’s under a flat colour and gallery lighting.
Framing options that replace or complement edge finishing
Framing sidesteps the whole edge question, and it’s worth treating as a genuine option rather than a fallback for pieces you didn’t get around to finishing.
A floating frame, sometimes called a tray frame, holds the canvas slightly inset from the frame’s inner edge, leaving a shadow gap around the perimeter. It suits deeper stretcher bars best, roughly 3.5cm or more, since a shallow canvas looks lost inside a tray frame’s gap. Boxed and tray frames are a preferred presentation for gallery-wrapped and painted-edge canvases precisely because the frame doesn’t touch or obscure the finish underneath.
Choosing to frame changes the finishing calculation entirely. If the sides will sit visible through a floating frame’s gap, you still need a proper finish. If the frame fully encloses the sides, as a traditional boxed frame does, a raw or lightly primed edge is perfectly acceptable since nobody will see it.
- Walnut and other dark hardwood floating frames are a strong current trend for abstract and landscape work, adding warmth without competing with the painting.
- A frame also protects the canvas edges from knocks and dust, which matters more for pieces travelling to exhibitions or changing hands between owners.
- Framing a previously unfinished canvas instantly upgrades how it reads on a wall, and it removes the pressure to get a paint finish perfect.
How do you choose the right canvas edge finish?
Work through this in order and the decision usually makes itself within a minute or two.
- Check stretcher depth first. Under 2cm, favour solid colour or tape; a wrap will look pinched. Over 3.5cm, a gallery wrap or floating frame both have room to work properly.
- Decide the display method. Going straight on a wall unframed, edges need a real finish. Going into any kind of frame, the finish only matters where it will actually be visible.
- Consider market intent. Selling to a collector or entering a juried exhibition, invest in a proper paint finish or framing. Personal studies or quick sales, tape is defensible.
- Set a budget for time and materials. Gesso and a couple of brushes cost very little; a bespoke frame is a bigger outlay but removes the edge question completely.
Before calling a piece finished, run through a short checklist: are staples fully covered, is the paint or gesso opaque right into the corners, does the chosen edge tone actually suit the frame you’re planning to use (a warm oak frame against a cool black edge can clash), and is there any tape residue or adhesive shine left over from an earlier temporary fix? Visible staples and mismatched tones between edge and frame are the two red flags that give away an unfinished-looking piece fastest, even when the front painting itself is strong.
Frametheworld’s practical perspective on canvas finishing
Some services work with artists who prefer to commission a finished piece rather than finishing the edges themselves, including custom gallery-wrap commissions where the image is planned to extend around the stretcher from the first brushstroke, and bespoke framing built to match a specific edge treatment.
Outsourcing the finish carries real weight for anyone preparing work for sale or exhibition: a professionally finished edge removes one of the few things that can undercut an otherwise strong painting at the framer’s counter or in front of a buyer. For collectors and interior projects working to a deadline, that consistency matters more than saving an afternoon in the studio.
An editorial note on restraint in finishing choices
Test any new finish on a spare stretcher before touching a real painting. It costs nothing and reveals whether a black gesso edge, say, actually reads as intentional against your specific colour palette rather than as an afterthought.
Consistency across a body of work matters more than any single clever finish. If you’re building a series for a show, pick one approach and repeat it, because a wall of mismatched edges undercuts even strong individual pieces. A subtle, uniform finish nearly always beats one showy edge treatment sitting awkwardly next to five plain ones.
— Lennard
Get a professional finish without the studio guesswork
If painting a straight edge in one continuous pull sounds like more trouble than it’s worth, that’s exactly the gap Frametheworld fills for practising artists and collectors alike. Every piece in the Handpainted masterpieces collection can be commissioned with the edge treatment already built into the brief, whether that’s a full gallery wrap, a solid black finish, or bespoke framing to match a specific interior. DIY finishing suits studies and personal work where a slightly imperfect edge doesn’t matter; commissioning a finished piece makes more sense once the work is heading to a client’s wall, a gallery, or a commercial fit-out. Browse the Abstract collection or Landscape range, then request a bespoke commission through the site to specify sizing, edge finish and framing together in one brief.
Sources
For more detail on the techniques covered above, these sources are worth bookmarking: EmptyEasel’s practitioner tips on painting, taping and staining edges; Draw and Paint For Fun’s taxonomy of the six common edge options; and HM Canvases’ framing-focused guide to creative side finishes. If you’d rather have the finish handled for you, Frametheworld’s landing page covers commissioning options directly.
- How Professional Artists Finish the Edges of A Canvas — CAI
- 5 Tips for professionally finishing the canvas edges of your paintings – EmptyEasel
- Mirrored Edge vs. Solid Edge: What’s Right for Your Canvas Print? - Grand River Giclée
- Step-by-step instructions for professionally finishing the canvas edge – LynnBelleusArt
FAQ
How do you finish a canvas edge?
The main routes are painting the sides a solid colour (often with black gesso), extending the image around as a gallery wrap, leaving the canvas raw or primed, or applying a quick tape fix. A recommended workflow is to tape the front edge, paint the sides, remove the tape before it fully dries, then varnish once cured.
What is the 70/30 rule in painting?
It’s a compositional guideline for the painting’s face and has no direct bearing on how the edges themselves should be finished.
What is the 80/20 rule in painting?
Like the 70/30 version, this is a composition principle: roughly 80% of the canvas carries one dominant tone, texture or mass, with 20% left as contrast or focal detail. It’s about visual weight distribution across the painting, not a rule about edge treatment.
Should you paint the edges of a canvas?
It depends on stretcher depth and display method: a shallow, unframed canvas benefits from a painted or gessoed edge since it will be seen from an angle. Deep stretcher bars going into a floating frame, or any canvas going into a fully boxed frame, don’t need a painted edge because it either won’t show or is meant to be part of a deliberate gallery-wrap design. Either approach can be incorporated into a commissioned piece from the outset.
Is a gallery wrap or a painted edge better for selling work?
Neither is objectively better; a gallery wrap suits landscapes and abstracts without hard geometric lines, while a solid painted edge suits work with a strong, defined composition. Practical decision notes suggest choosing based on whether the image itself would distort attractively when carried around a corner.


Laat een reactie achter
Deze site wordt beschermd door hCaptcha en het privacybeleid en de servicevoorwaarden van hCaptcha zijn van toepassing.